Lifting The Lid On Box Hill: Central Ammunition Depot, Tunnel Quarry, Corsham
This article is more than five years old and was last updated in February 2021.
'Lifting The Lid On Box Hill'
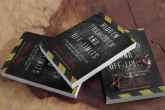
In 2004 MVP Video Productions released their second film, the follow-up to 'Deep, Dark & Dusty'. The same production team were invited back to the secret tunnels beneath Corsham by the Ministry of Defence, who this time granted them exclusive access to film in their formerly top secret Tunnel Quarry site.
The 68 minute documentary explores the MOD's Central Ammunitions Depot in more depth. Based in Tunnel Quarry, the depot was conceived in the mid-1930s to hide from the enemy over 100,000 tons of bombs, shells, cordite and small arms. Ammunition that the country depended upon to win the Second World War.
Once again narrated by Jeremy English, the film explores the fascinating underground labyrinth created by the Royal Engineers. Over 100 acres of underground passageways and chambers were converted into an amazing twin-platform underground railways station, engine shed, powerhouse, miles of conveyer belting, slope shafts, admin offices, barrack blocks, engineering shops and surface loading buildings.
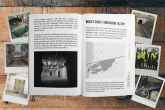
Now 15 years on, the DVD is no longer in production and as it contains rare information, which isn't readily available anywhere else on the internet, it seemed like a good idea to but the full transcript of the film online, especially as in the production outfit's first film Jeremy states that "today there's a serious threat that this history will be lost forever, old quarries are in danger of being sealed and forgotten." So, in the spirit of preserving and making available this special part of British history forever, the full transcript of the film is available below.
Filming also took place in Spring Quarry to view the wartime murals, and Browns Quarry in the former No. 10 Fighter Command wartime control room.
'Lifting The Lid On Box Hill' Full DVD Transcript
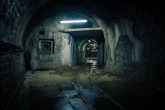
Hidden 100 feet below our quiet, English countryside under Box Hill in Wiltshire is an immense network of underground passageways and tunnels that were used from the mid-1930s, through World War II, into the 1960s in total secrecy. It was the Central Ammunition Depot's Tunnel Quarry in Corsham, Wiltshire.
To explain the origins of the site, we must go back in time to 1841, when Isambard Kingdom Brunel was constructing the mighty Box railway tunnel for the Great Western Railway.
Whilst his workforce was busy borrowing under the very tranquil and remote village of Box to join together Bristol and London by broad-gauge railway, they discovered very large, apparently endless supplies of Bath stone.
When the tunnel was completed the men he employed, many of whom were local, were quick to purchase land in the area and open their own quarries. With a high demand for this fine, golden coloured building stone, underground quarrying quickly established itself. Over the next 50 years and total of 14 quarries in the Box and Corsham areas alone were opened.
The stone was extracted by hand using jadding bars and handsaws. Once released from the Bath stone seam, it was moved by the use of cranes and wire ropes. And then transported out of the quarry by horse and cart or narrow-gauge quarry railways.
Following the First World War the Bath stone industry declined, many quarries being abandoned because the stone had become exhausted. This left a vast honeycombed area of passageways and caverns underground.
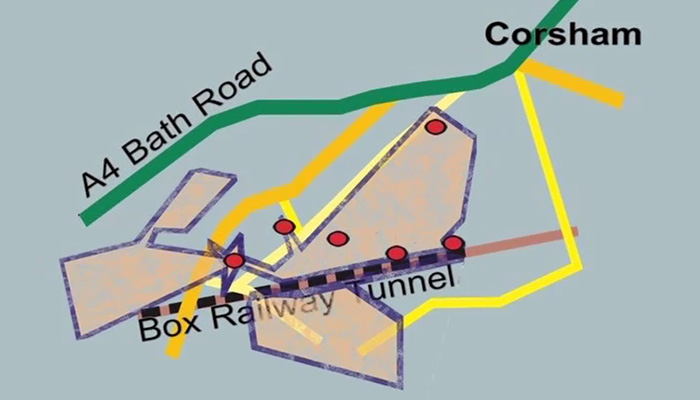
In the central and eastern end of Box Hill, to the north of the railway tunnel, five quarries were located. These were; the 1844 Corsham Down and Seven Shaft Quarry (later to become known as Tunnel Quarry), the 1864 Stones No. 6 Quarry, the 1875 Hudswell Quarry, 1878 Ground Stone (or No. 6 Box Quarry) and 1818 Browns Quarry.
To the west and south of this area, two other extremely large quarries interconnected. These were Box and Spring quarries.
As the mineral was extracted by the quarrymen, the galleries they left behind were backfilled with the waste stone. Before long the workings interconnected with each other and gave rise to an area of approximately 300 acres.
In 1934, with World War II looming, the War Office identified these quarries, along with others at Eastlay and Monkton Farleigh, to be most suitable for the conversion to the mass storage of ammunition. Plans were made to build the largest underground ammunition depot in the world.
By late-1936, the Royal Engineers has arrived in Corsham and started the huge task of converting the old Baths stone quarries in to a new ammunition storage depot. Thousands of men were drafted in to work on the conversion, many from South Wales, Durham and the North of England. In all, 57 trades and professions were needed for the work. One of the first tasks undertaken was to remove the old stone backfill, which was estimated as approximately two million tons.
In 1844, during the Bath stone era a half-mile-long main line railway siding was driven into the the new Randell & Saunders Corsham Down Quarry, from alongside the eastern portal of the Box railway tunnel.
Originally Great Western broad-gauge track was laid, as this early illustration show. Later it was converted to standard gauge, as seen here in the late-1890s photographs of one of the Great Western's Dean Single locomotives on a London-bound express.
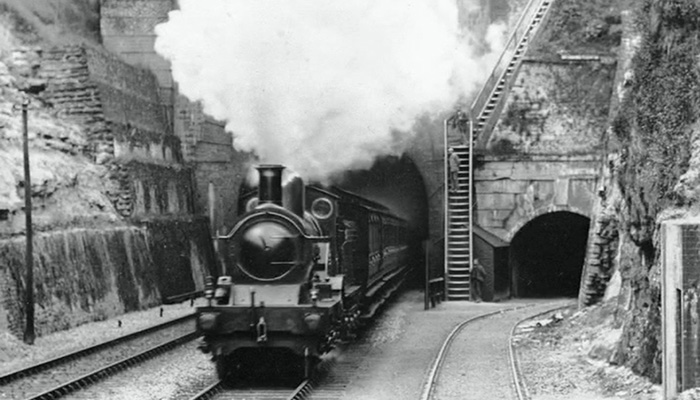
The first engine of this class, number 3031, actually derailed inside Box Tunnel in 1893, which subsequently led to the whole class having a modified front bogey fitted.
The waste stone was removed predominantly by hand, loading it into rail tipper trucks. These were towed by a fleet of 54 20-horsepower Ruston diesel locomotives, running on temporarily-laid two-foot gauge Decauville track to the main line railway siding within the Corsham Down Quarry. The waste stone was then transferred into ten ton open-top Great Western trucks.
The trains were then taken two and a half miles east to Thingley Junction, where the stone was tipped and became the base for new marshalling yards, which were to serve the ammunition depots. The yard was opened in 1937, along with the adjoining Air Ministry “loop line” in 1943. The loop allowed direct railway access into and out of the Tunnel complex without recourse to the marshalling yards if required. It also enabled ammunition trains to have direct access to and from Southampton docks, which in the run up to the D-Day invasions was fully utilised.
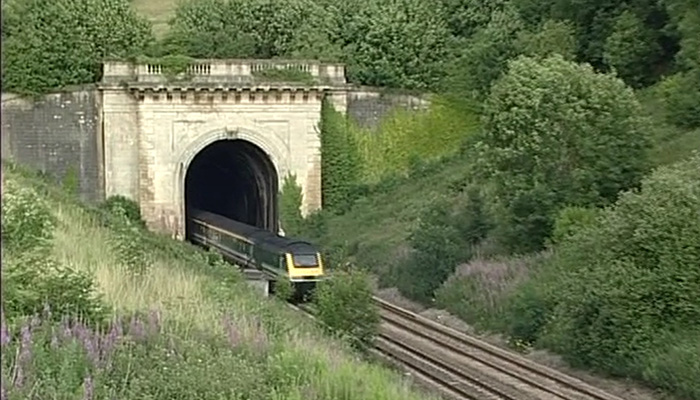
To allow the ammunition train wagons to enter the depot, the tunnel entrance and roof had to be raised, thereby losing it's ornamental Brunel arched entrance. Here one of the three War Department Hunslet diesel locomotives heads a train into the site.
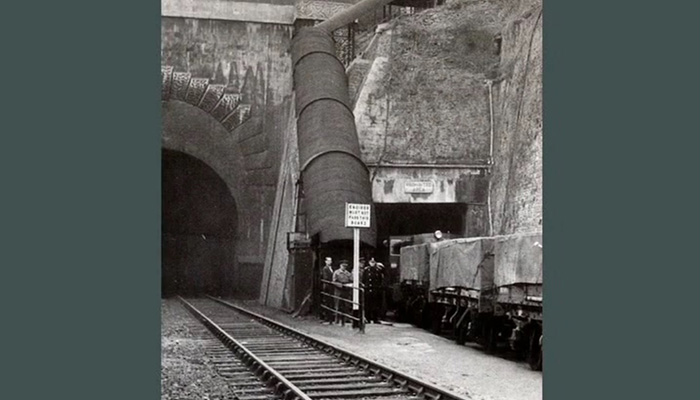
Originally the quarrymen would descend a vertical ladder down the tunnel face and then walk into the quarry to work, this was replaced with a dog-legged stairway that the War Office enhanced with a corrugated covered walkway. The stairs remain in use today, but without the tin roof. No longer used for access to the now sealed quarry entrance. It serves as an emergency and maintenance access point for the main railway line through Box Tunnel.
When built the quarry branch line ran parallel to the Great Western main line as far as Corsham station. Modern day realignment to the running lines has now utilised all of the space, it's hard to visualise that it ever existed. This London express is now passing the site of the old Corsham station and stone yard. The white building seen in the distance is the goods shed, which still survives today albeit as a car repairer.

Both portal entrances to Brunel's tunnel were very large, this was an illusion created by Brunel. The entrances actually taper downwards just inside the tunnel mouth to normal rail tunnel dimensions. However, the eastern portal was further modified with a large insert engineering brick to strengthen the entrance, this was at the insistence of the Great Western as a precaution against possible collapse, which might be caused if an ammunition train was to explode.
Above the running lines is a doorway that leads into the remnants of the old Bath stone workings.
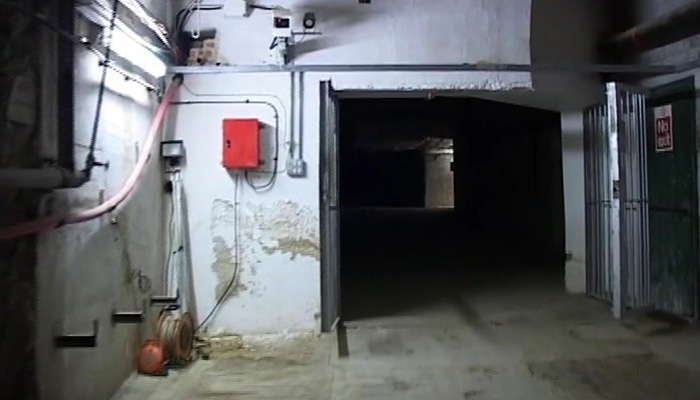
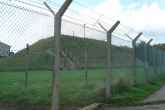
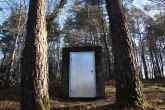
The Tunnel Quarry rail entrance as it is today, is extremely overgrown. The track was lifted in 1974, after the closure of the depot and behind the large iron doors several thick concrete walls and CCTV systems now protect the site from the outside world.
The Ministry of Defence granted us exclusive access to film the site. So, for the first time ever, we can lift the lid of Box Hill and take you on a video tour of the depot that has been and still is excluded from public view.
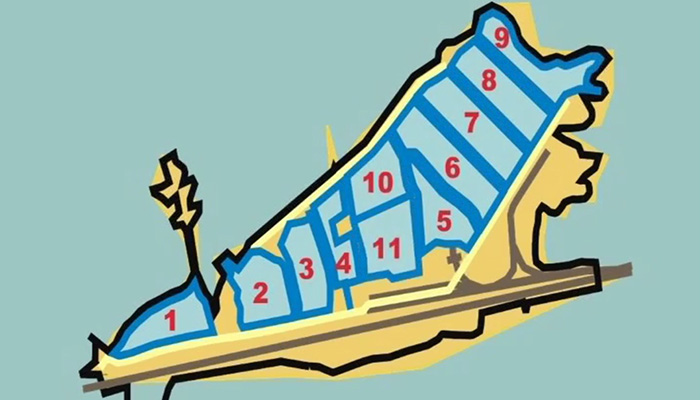
The quarrymen left a wedge-shaped site containing a single railway siding, which the Royal Engineers then adapted. They created a central railway platform area with three main haulage ways. Main East and West, that run either side of the platform area and south of the ammunition storage districts in the existing Bath stone tunnels. And, a newly constructed Hudswell Drift, which is located to the north of the 11 proposed new storage areas.
Each district was approximately five acres in size, giving the depot an overall storage capacity of 100,000 tons of munitions.
Starting our tour in the railway tunnel that leads into the site from the Box eastern portal, we see the railway junction that leads to a turning triangle and 700 foot long head shunt. This railway track layout enabled a train to be brought into the site and to be reversed before being places into one of the platforms of the underground railway station.
This view is where the triangle head shunt line re-joins the main route into the complex.
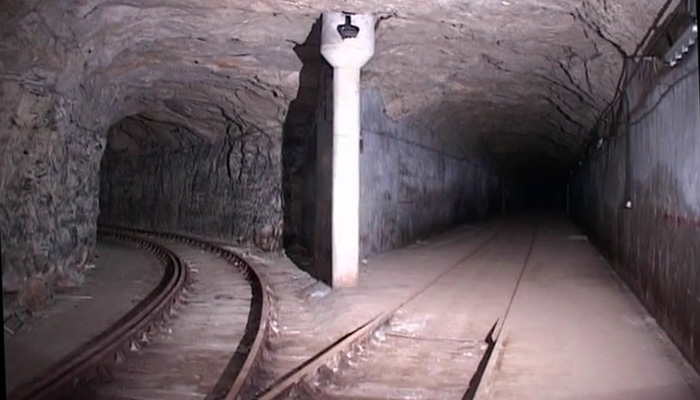
The next set of points is where the railway line splits and separates to run into the two platforms of the underground station. Adjacent to here through a small doorway, a purpose built subway exists. Originally excavated by the quarrymen for stone and facilitating a route into the adjacent Spring Quarry, it was soon found that the area flooded.
The gallery extended underneath the Box railway tunnel and on the day of filming the water level minimal. However, tide marks on the stone show how high it normally is. A boat has to be regularly used by railway maintenance staff to make the safety inspections of the underside of the track in the tunnel. Once this chamber fills with water it escapes through a central drainage duct located between the tracks in Box railway tunnel. It then runs down the 1:100 slope of the line to the western end of the tunnel and on and in to the bybrook in Box village.
Back now on the quarry railway line, this next junction is on the approach to the northern platform and to the right the line leads into the locomotive servicing and stabling shed.
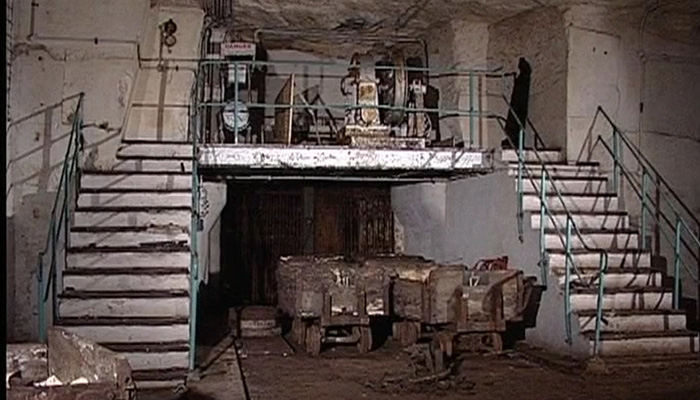
The shed has three lines radiating off a central turntable, which allowed the depot's Hudson Hunslet 0-6-0 standard-gauge War Department diesels to be serviced and housed when not in use. Because of the very tight curves in the depot, derailments did occur from time to time, and of course the use of a crane was out of the question. The re-railing devices survive today, standing against the wall in the shed.
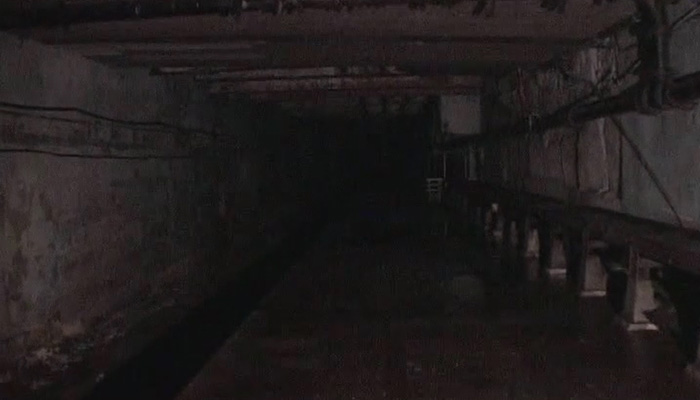
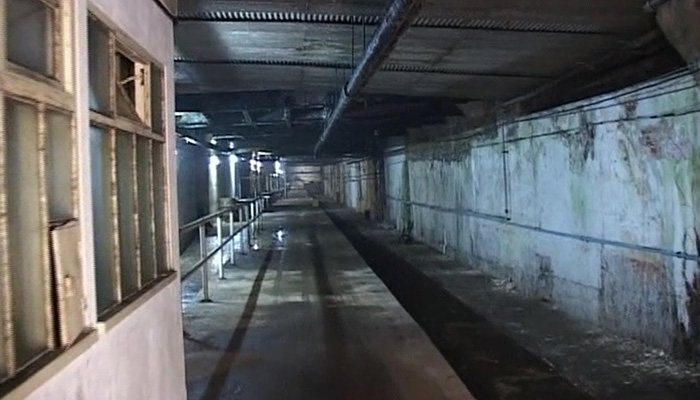
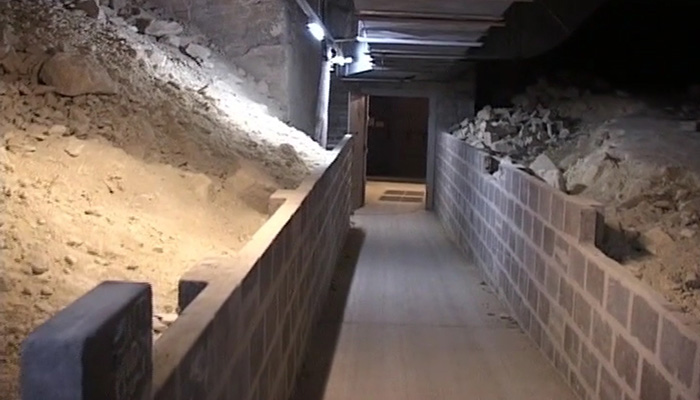
Now aboard our electric transporter, we travel westwards along the southern railway platform. The site today is only partially lit and so the majority of the filming was carried out in complete darkness. Some of the footage recorded was pushing the gain of our digital cameras to the absolute limit.
It was at this point on the platform that the original Bath stone siding ended. A simple stone loading platform previously existed, but this was removed by the Royal Engineers and the siding extended westwards as seen today.
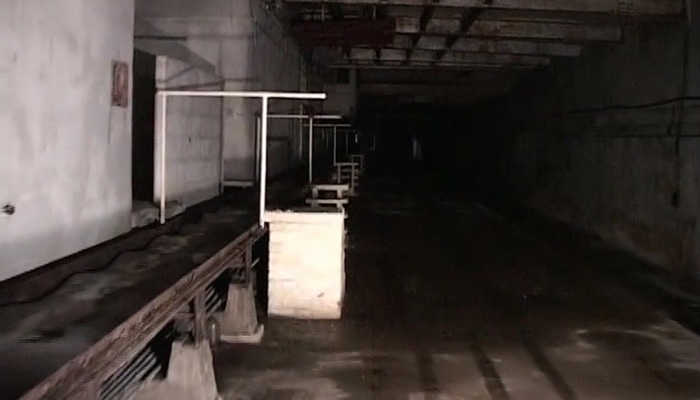
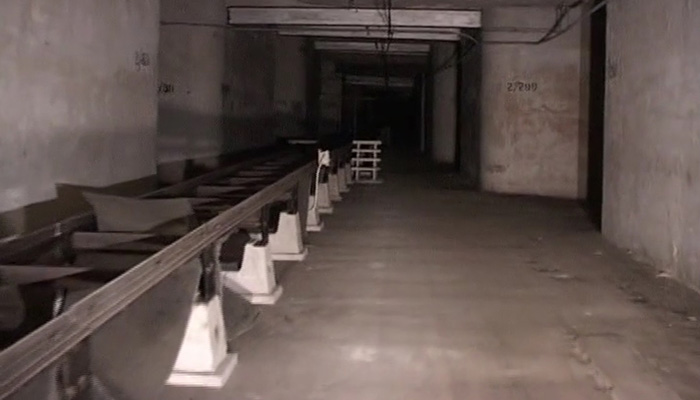
This is the shorter of the two railway platforms that we're created. Measuring 550 feet in length, it could accommodate 30 standard-gauge covered vans or trucks. The ammunition would be loaded or unloaded from the wagons using portable gravity roller runways, which connected directly on to the conveyor belt system, seen here on the right.
The conveyor belt system ran the length of both platforms and departed in both east and west directions. So that ammunition could be conveyed into and away from any of the storage districts.
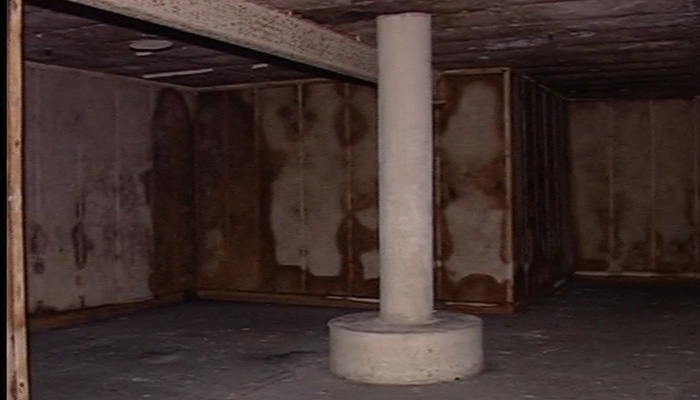
The roof is heavily reinforced. The engineers, during the conversion of the site, had to use an enormous amount of steel girders and concrete to stabilise the overburden once the waste stone has been removed. At one point the work had to be stopped until three huge 150-square-foot concrete pads had been constructed to alleviate any possible ceiling movement and also to strengthen against surface bombing.
At the end of the southern platform, the conveyor system has to dog-leg underneath the No. 5 slope shaft, which depends into the depot at this point.
Now travelling back along the southern platform some of the many walkovers across the many conveyors belts can be seen, these are in evidence throughout the site. The separating walls with communicating archways divides the two platforms.
A myth has existed for a long time about a strategic steam locomotive reserve being housed in this site. We can report that there is absolutely no evidence that could support this claim. The tight radius tracks, the extremely low head room and the damp conditions would have made storage let alone operation of main line steam locomotives impossible.
The conveyor slopes downwards at this point into the Main East haulage way.
Moving round on to the northern platform, we pass a control office and the other slope down to the Main East haulage way. The conveyor system at this point had recently been removed.
Underneath the railway platform the two platform conveyor systems meet and the run on along the Main East haulage way. They're know as the high and low conveyors and run initially under the northern platform siding, then under a girder bridge carrying the engine shed siding and continue on to service the five eastern-most storage districts, numbers five, six, seven, eight and nine.
Back on the northern platform, which has the benefit of lighting, we can see more clearly the conveyor system, the walks overs and conveyor motors. We pass on the right a utility area, constructed between the platforms and the storage districts, this is the compressor house and the two original heavy-duty compressor can be seen.
A short distance away is the conveyor control room, this room controlled the seven and a half miles of conveyor belting within the depot. The operators overlooked both platforms from a central elevated position, and this was the central control for all ammunition conveyor movements.
Opposite is the power house. To safeguard the depot against enemy action, a huge power station was constructed. Three generating sets were planned, but only two were ever installed.
Advertisement ‐ Content Continues Below.
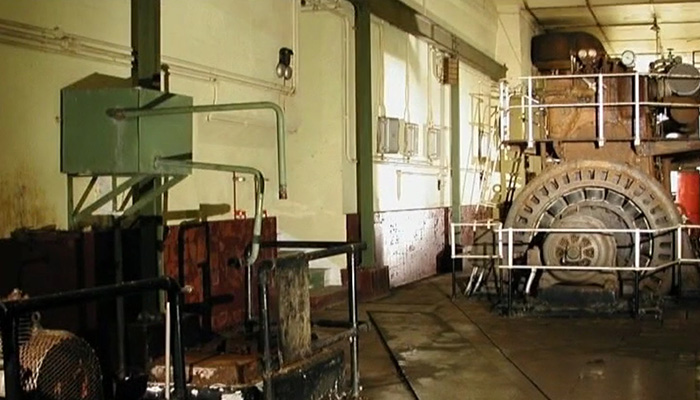
Three 650 horsepower 440kVa generator sets weight 60 tons each. The generating sets were provided by Ruston & Hornsby of Lincoln. They're housed in a 150 foot long, 25 foot high, specially constructed chamber, that was achieved by lowering the floor by ten feet.
To the rear of the generators a huge switch room was established for controlling the power across the depot.
Of all the districts in the depot only one, No. 11 district, had its entrance directly onto the platform area. Here the large steel blast doors seen with the start of the conveyor system into the storage area.
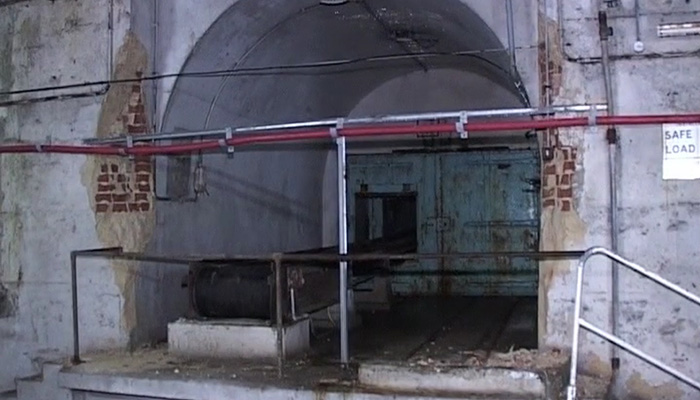
The temporary conveyor bringing unit connected the platform or railway truck to the district when ammunition was required to be transported.
The narrow-gauge railway seen on the right enabled the larger munitions to be offloaded from the railway trucks via an overhead crane and transported into the storage areas.
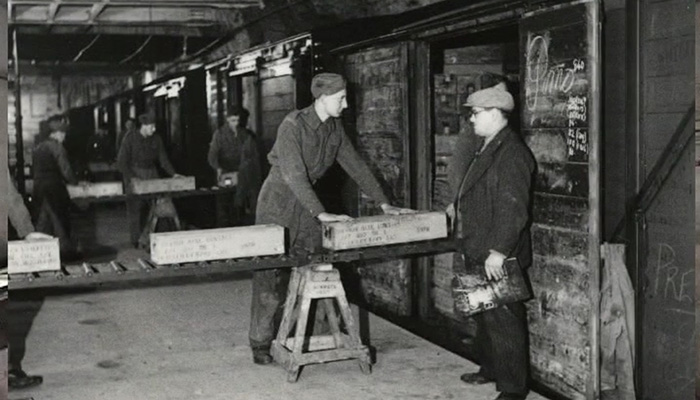
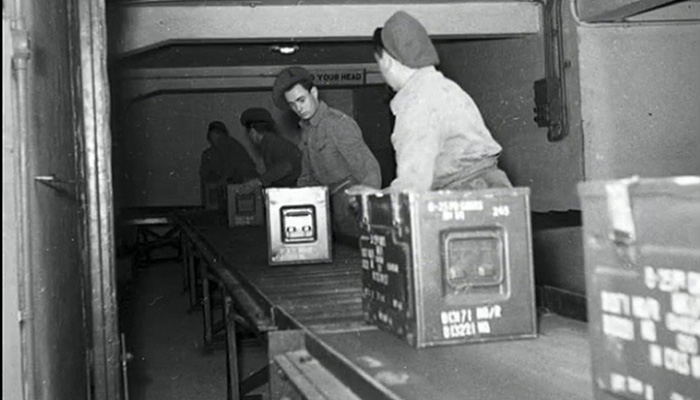
One can only try to imagine what this place was like during the war years. Only a few images were ever taken during that time and the only by the War Office. This one shows a train being loaded with ammunition in 1943.
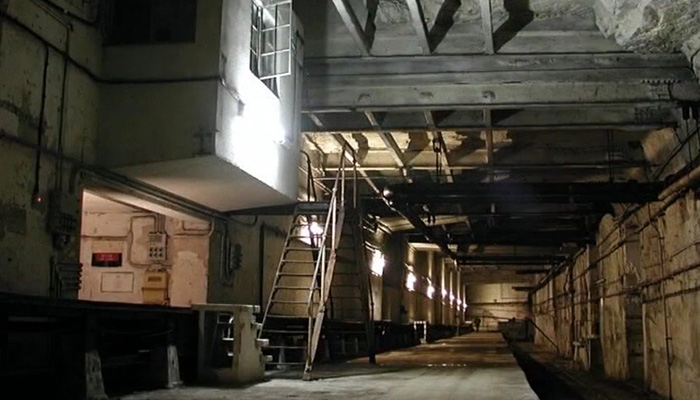
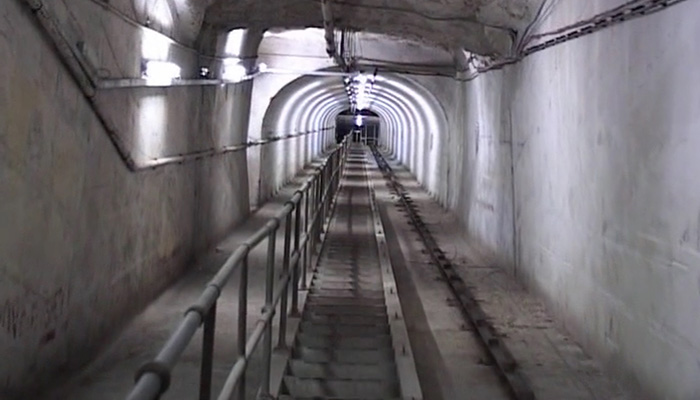
The underground railway and platform area was the primary route for ammunition into and out of the depot. It handled approximately 1,300 to 1,500 tons a day, but alternative entrances capable of the same movement of tonnage were required. This necessitated four slope shafts to be constructed down into the complex. One of which is the No. 5 slope shaft, we see here, situated at the western end of the two platforms.
Located at ground level at the top of this slope shaft is a surface loading facility known as the Main Surface Loading Platform, or MSLP. This massively strengthened, two-level concrete building was covered with an earth mound for protection against bombing and was completed in 1941.
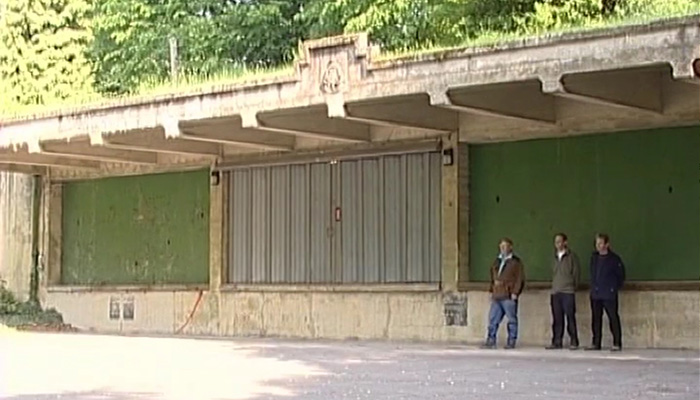
In this photograph taken shortly after its opening in World War II, we see the open loading bays on to which the army lorries would dock themselves for the ammunitions. The photographer was closely observed by the War Department police. Today the escorts for our visit strike a similar pose to that of 60 years ago and still watch the video camera man very closely.
The Royal Army Ordnance Corps' (RAOC) regimental badge is proudly displayed above the loading bay doors. With three of the four loading bays now boarded up, only one ingress point survives. Most of the loading bay internal area is now used for modern day military storage.
With the surface boiler house chimney in the distance, we can see here how the MSLP has been engineered to encompass substantial earthworks around it to protect it from aerial bombardment.
On entering the ground floor of MSLP, there's a police lodge and a traffic office through which access to the tops of the four slope shafts from the underground storage areas is made. Each shaft has large steel blast doors fitted, but today the conveyor belt system, that started and finished here for moving the ammunition up and down the shafts, has been removed.
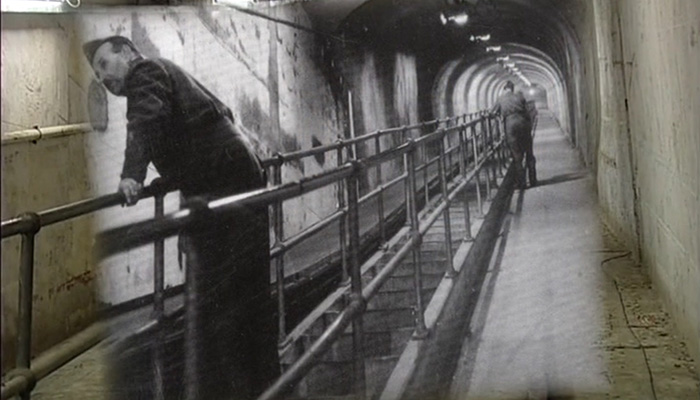
The shafts utilise two methods of munitions movement. Conveyor belting and truck haulage. On the right is the slope up to the first floor of the MSLP where the trucks were hauled to. On the left is where the conveyor belting once stood and the handrails were for the central pedestrian steps in the shafts.
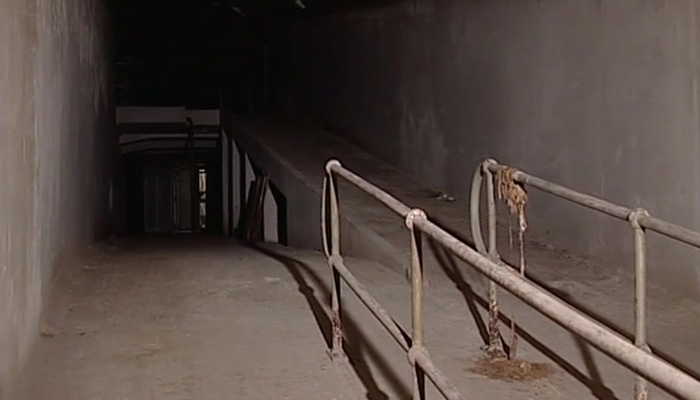
The haulage system was used for the heavier bombs and shells that could not travel on the conveyors. They utilised trucks with special dual-rim wheels. These had a rail flange for running on the two-foot-gauge railway and rubber wheels for running everywhere else in the depot.
The No. 3 shaft differs from the others, as a 339 foot long horizontal tunnel had to be constructed before the shaft actually descended. This was to enable the slope shaft to access No. 10 district. Together with No. 4 shaft, that served No. 11 district, these were the only shafts that connected directly into a storage area.
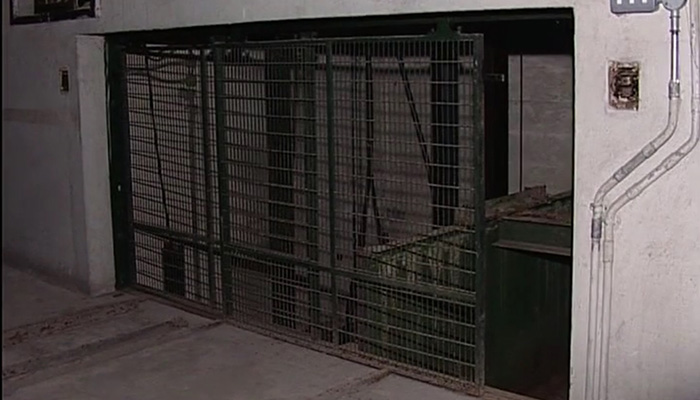
Now on the first floor of the MSLP, this twin-cage lift allowed the trucks to be moved between the two floors. This uniquely shaped hexagonal chamber gave access to all four shafts and hauled trucks would be handled and marshalled here. The four slope shafts radiating from the MSLP are No. 2, 3, 4 and 5. What happened to No. 1? Well, this was used during the original conversion work of the site and was later filled in, hence the missing number.
No. 1 shaft was originally called No. 7 shaft and another slope shaft at the western end of the site is called No. 6 slope shaft. These are wartime photographs show the MSLP in use with ammunition making its way towards and down the slope shaft.
No. 5 shaft is the only shaft still in use today, retaining its own winch system and lighting. This quarter of a mile long incline descends into the heart of the ammunition depot. In this wartime photograph, the Royal Army Ordnance Corps men are awaiting an issue of ammunition up the shaft to the MSLP, whilst at the bottom the high explosive anti-aircraft shells are being loaded on to slope shaft conveyor.
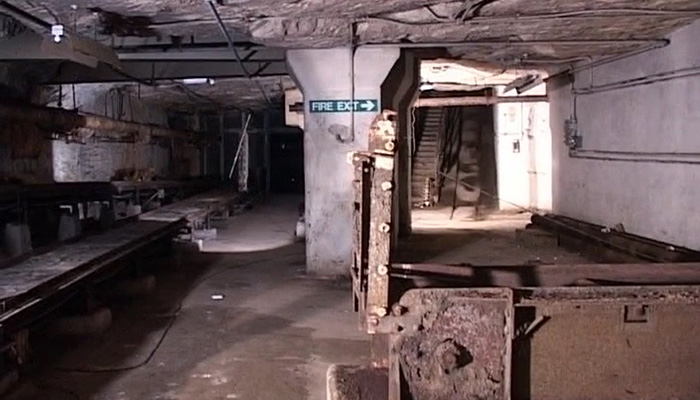
Back on our transporter, we head westwards alone the Main West haulage way. This route give conveyor access to districts two, three and four. To our right is the entrance to depot's office complex. Today, the view inside the offices is of dereliction. The effect of damp, plainly evident, was caused by high humidity levels due to the lack of ventilation, which was turned off when the depot closed in the 1960s.
This was the office of the officer commanding Tunnel, which in its day in true military fashion positively gleamed. The complex housed a teleprinter room for dealing with the movement of ammunition, clerks offices, medical rooms, Chaplin's office, and situated within a small canteen, a telephone exchange, which was constantly manned 24 hours a day by civilian staff who operated the private branch exchange. Today their voices are but echoes of the past.
Continuing along the Main West, we see the concrete support pillars that used to hold the conveyor system. These conveyors were removed and reinstalled in the Monkton Farleigh ammunition sub-depot when it opened as a museum. Sadly, this has now closed and is also locked away from view, the site is used by a security achieve establishment.
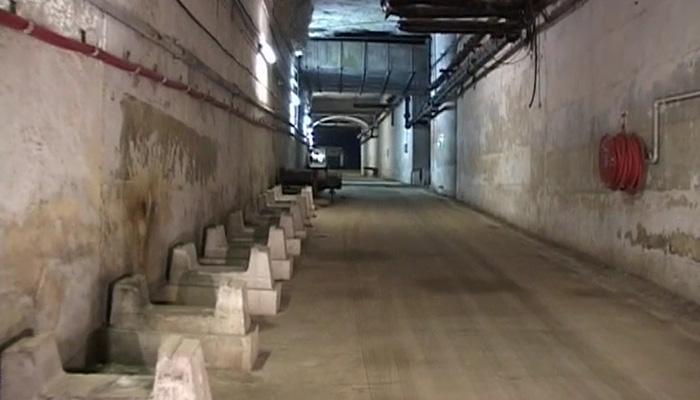
In the ceiling, note the large metal trunking, this is an airway corridor that runs above the haulage way and draws air from the adjacent Spring Quarry into the Tunnel Quarry ventilation system. Also note the arch in the ceiling, this is the point where the original 1844 Corsham Down Quarry slope shaft entered the main haulage way. During its life it became known as the Seven Shaft Quarry. In 1908 the Pockeridge Quarry and in 1930 the Strennet Construction Company. Strennet did not extract stone blocks, but made reconstituted ones from the waste stone.
The slope shaft, then known as the Strennet shaft, was poorly situated for ammunition depot use, so after use in the construction phase of the depot as No. 1 slope shaft, it was sealed up in 1941 and subsequently built upon at the surface.
The haulage way widens as it passes No. 2 district, this area was utilised for munitions storage when the districts were fall, as these crescent shapes indentations show in the floor.
The whole of the depot's floor was covered two-inch-thick colas tarmac, this gave a spark proof surface so that if anything was accidentally dropped there would be no danger of fire or explosion.
The entrance to No. 2 district is on our right. The conveyor belt system ends here, as the proposed No. 1 storage district ahead of us never came to fruition, so there was no need to install it any further west.
We're now in the area of what was the workings of the Stone Brothers No. 6 Quarry. The actual demarcation between the old quarries has been lost over time, with all the conversion work that has since taken place, but we are still following the route of the original Bath stone main haulage way, and way back in quarry days it would have looked like this.
These are the main gates to the ammunition depot, fitted original with steel blast doors. This area housed a military police contraband gate, that controlled personnel movements into and out of the ammunition storage areas.
On the other side of the gates the narrow-gauge railway line still exist. As we turn, the area to our left was a barrack block. Access through the sealed doorway lead to facilities for the 300 soldiers who were based here. Dormitories, canteen and recreational areas were all centrally heated, it remained intact until the early-1980s, but today access is totally restricted.
We're now at the bottom of slope shaft No. 6, originally Stone Brothers No. 6 Quarry entrance, it was sunk in 1864 and by the 1920s had fallen into disuse. But, the Royal Engineers regraded and refurbished it and it's still in use today, albeit only as an air shaft.
Still progressing west along the original haulage way, we approach the entrance to the Emergency Service Forward Control Room. This is a modern day facility, set up for evacuation and fire fighting purposes. This room acts as a liaison point between underground and the surface during an emergency situation. In ammunition depot days this passageway continued straight on.
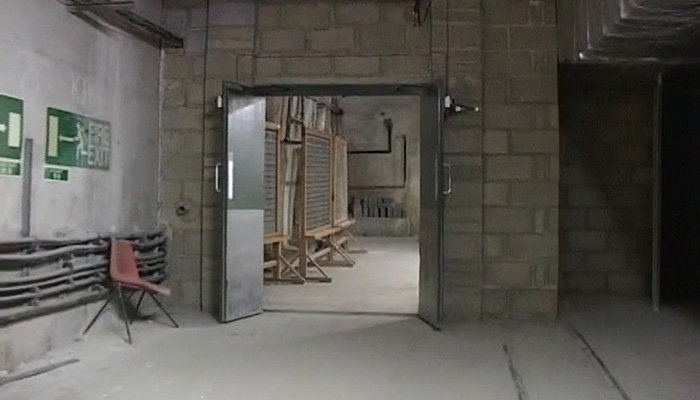
On leaving the emergency control room, we come to the junction with another haulage way, that was the 1880s link to the 1856 Browns Quarry, situated to the north.
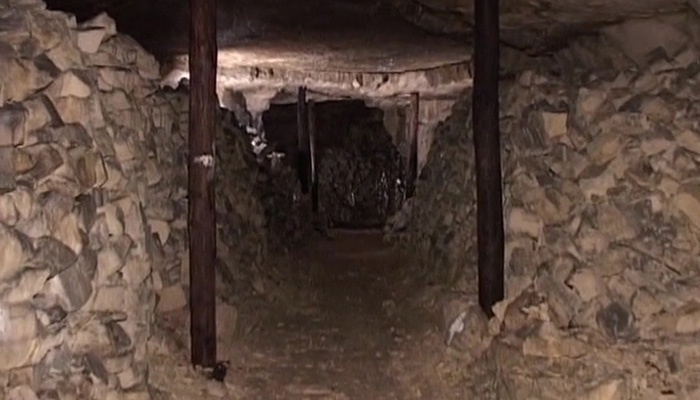
The narrow 230 yard long heading was constructed in quarrying days to bring stone from Browns Quarry down into Stone Brothers Quarry for onward transportation to the Great Western's siding in Tunnel Quarry. Today the heading has been narrowed even more than the original, but the passageway still follows the Bath stone geology, gently rising to a point near to Browns Quarry entrance, where there's a series of steps to take you on into the old quarry area.
Although nothing to do with the ammunition depot, but being constructed at the same time as Tunnel Quarry by the Royal Engineers, we were allowed to film 1940s No. 10 Fighter Command Group Headquarter's underground control room.
Through this door leads the steps down in to two specially constructed chambers, bearing the sign of the control room's latter-day use. The construction of these chambers was one of the greatest challenges for the Royal Engineers in 1940.

Two 50 by 75 foot interconnecting cavities with 45 foot high ceilings had to be created to accommodate the control room and their ancillary offices. Each had two mezzanine floors with observation galleries. Today the chambers are striped of all internal fittings, but it's clear to see where the floors and joists once were fixed.
At the top of the walls heavy gauge rails were installed so each of the 20 inch steel girders that were used to support the ceiling could be hauled up and slid into place. This construction provided the rooms clear space without obstruction for any ceiling supports.
Looking back towards the entrance and the filter room, the two mezzanine floor marks can be seen, along with the two concrete encased interconnecting openings through to the control room itself. This wartime photograph shows the control room at work, with the plotting table and the two wooden panelled mezzanine floors above, which allowed the controllers to view the progress of the enemy towards Britain.
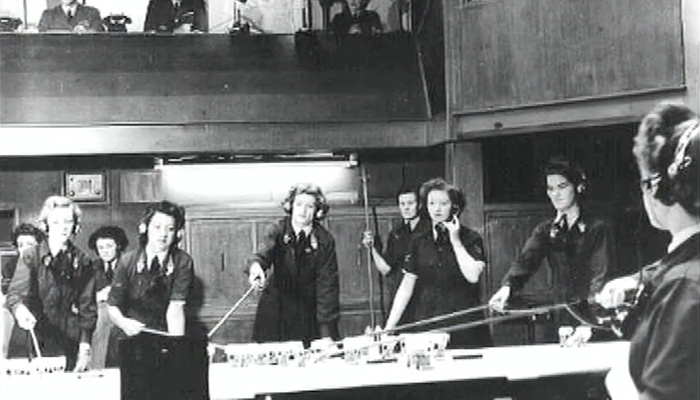
The control room was responsible for nine fighter airfields in the South of England and Wales, which were home to 19 squadrons, using 113 aircraft, comprising of Spitfires, Hurricanes and Blenheims.
The group commander, who sat in the gallery, would scramble the appropriate squadrons to intercept the enemy, based on information given to him by Fighter Command Headquarters at Bentley Priory in Stanmore in Middlesex.
Each plotter was in telephone contact with the radio operators who were located in rooms behind this desk. Square openings in the wall allowing paper messages to be passed back and forth.
With the removal of all the interior fittings, the radio rooms are revealed, along with the massive concrete works that enabled these chambers to be constructed.
Shortly after World War II, the control room fell into disuse. In 1945 the room became a radar training centre, and between 1951 and 1955 it was the Sector Operations Centre for the United Kingdom radar air defence system, codenamed ROTOR.
By late-1955 the control functions had been moved elsewhere and the room was striped, as these contractors' chalk inscriptions on the roof girders show.
Leaving Browns Quarry by the stairway, we return to the Main West haulage way. The area to our right was the proposed No. 1 district for the ammunition storage. This was never developed by the Royal Engineers due to a severe geological fault. It was however opened in 1943 by the Air Ministry as a telephone exchange and teleprinter switching centre, serving the South West of England. It was then known as South West Control, it remains today a secure military site.
Continuing on westwards, we are now approaching the adjoining Box Quarry, this part of Tunnel Quarry still retains its flavour of the old Bath stone origins. The walls show classic signs of Bath stone extraction. We'll continue on to the right shortly, but before that we'll take a short detour via a modern day connecting passageway into the adjacent Spring Quarry. We're at this point directly above Brunel's Great Western main line and some 100 feet below ground level.
Commencing in 1940, Spring Quarry was converted into the world's largest underground factory. Manufacturing aero engines for the war effort, it was opened in 1942 by Sir George White, the chairman of the Bristol Aeroplane Company.
To protect the workforce from the ammunition depot, all the available connections from Spring into Tunnel Quarry were sealed. The factory had a daily workforce of over 4,000 employees and entry into the ammunition depot of course had to be restricted.
This are of Spring Quarry was used for the canteen area for the factory, at the Bristol Aeroplane Company's insistence murals were painted on the walls to try to cheer up the workforce, who in the chairman's view would be depressed by working underground away from natural light.
Advertisement ‐ Content Continues Below.
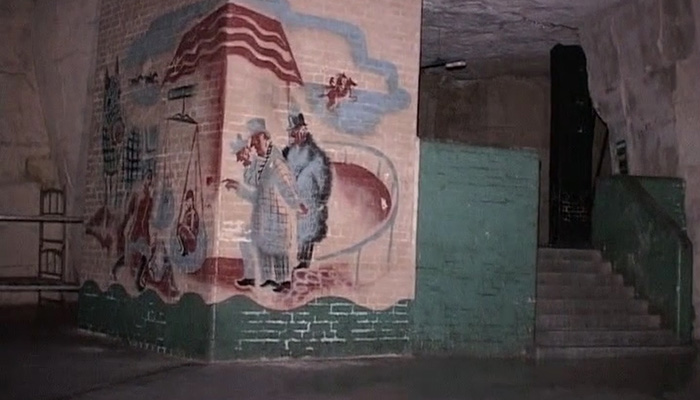
So using the available colours of the day, duck-egg blue, primer red and black, two artists, Olga Lehmann and Gilbert Wood, were employed to decorate the walls with period distinctive style floor to ceiling murals. Various subjects were featured including village scenes, a wedding, eskimos fishing, a boxing match, a day at the Epsom Derby, a pub scene and a very worrying scene of a missionary padres being boiled alive by African natives.
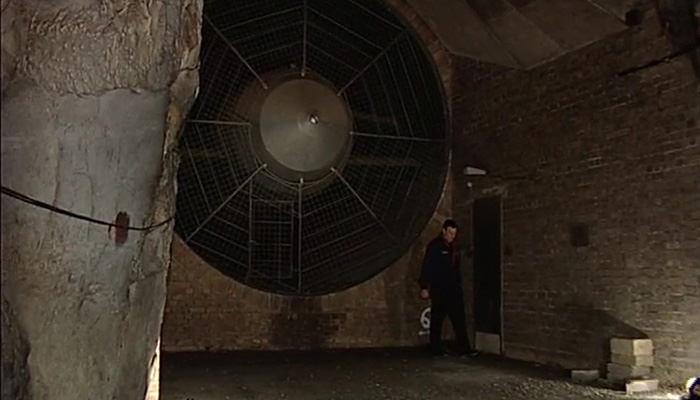
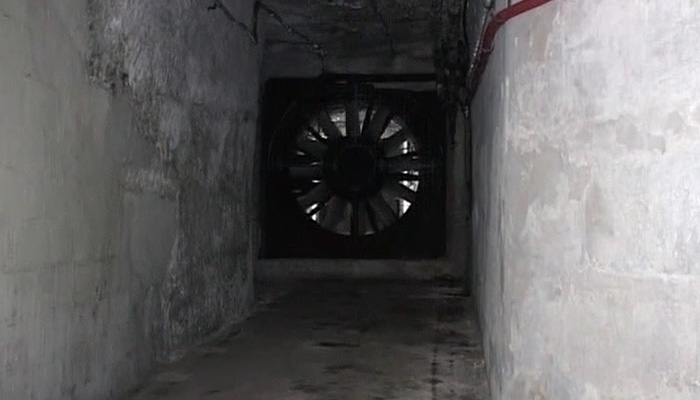
Now back in Tunnel Quarry, we progress towards the most western point of the ammunition depot. Four years after the opening of the depot, high humidity in the districts was giving concern. At this western end of Tunnel, behind this large fan, are three connecting drifts. One in to Box Quarry and two into Ground Stone Quarry.
The drift into Box is known locally as the Wind Tunnel or Windy Drift. This 1,500 foot long passageway was blasted through by quarrymen around the 1850s so that stone from Box Clift Quarry could be taken via a laid tramway into Tunnel Quarry and on to the Great Western Railway connection without having to be taken to the surface and across the Bradford Road. In those days the quarry masters had to pay a toll to cross the road with their stone, so the answer was to provide a connecting tunnel underground. The drift has two junctions along it that, we assume, we for future connection within Box, but these were never finished.
The entrance to the 1878 Ground Stone Quarry was from a single drift called Brewer's Drift. This was a part of the original Stones No. 6 Quarry, that extended through a large fault in the Bath stone westwards beyond Tunnel.
The Royal Engineers made use of these drifts to draw air into Tunnel Quarry. The effect of the air passing through the cold quarries caused the moisture to deposit itself in them. By funnelling the three drifts together and adding a large intake fan, the conditioned air could then circulate further into the Tunnel complex, but without the moisture.
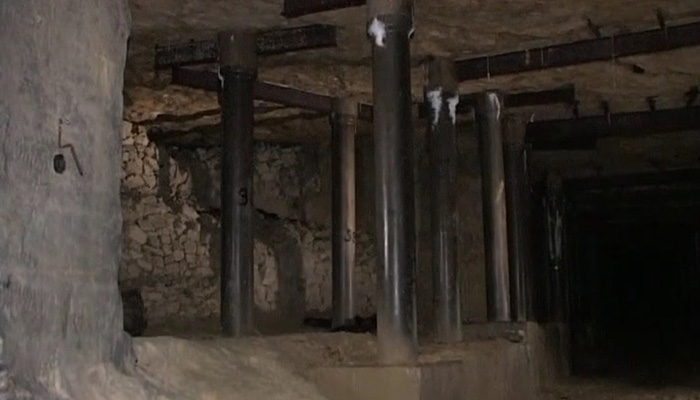
This view in Ground Stone Quarry show the large amount of strengthening work and columns that were installed to protect the drift from possible ceiling failures due to drying out.
Thus the CDI fan, or Cold Drift Inlet fan, was born. The huge 160 inch fan, which is the largest in the complex, can pass a capacity of 400,000 cubic feet of air per minute and is mounted of four inch thick cork to alleviate vibration. Along with additional smaller fans installed in the districts, the air conditioning of the site was achieved.
The nearest district to the fan, No. 2 district, gave the best conditions, but the more distant areas only showed a marginal improvement.
Also installed through this area was the major communications network that predominantly served the South West Control. These telephone cable ducts were routed from Tunnel Quarry to their physical connection points with the GPO on the main A4 Bath Road at Clift Quarry entrance and via an airshaft to the surface within Clift Quarry itself.
The Wind Tunnel drift was used as a route for the cables, running partially on wall brackets, but mainly in ducting under the quarry floor. Over 6,000 yards of cable ducting was installed to house and protect the cables from the then working quarry environment.
Turning East now, back towards the ammunition depot. We travel along the original Corsham Down haulage way. Sections of the site still remain today as they were in quarrying days. This area, part of the proposed area No. 1 storage district, is just as it was left by Stone Brothers when quarrying ceased in 1914.

To be able to build the South West Control, now on our left, Bath stone galleries had to be skilfully squared up and the floor graded. This allowed an office complex of about 30,000 square feet to be built to house the communications switching equipment, telephone switch boards and teleprinter centre. Access was via electric lift from the surface, that was installed in 1943.
Passing through the Emergency Service Forward Control Room again, we return towards the No. 6 slope shaft area. The air conditioning ducting at ceiling level is the feed from the CDI fan through into the districts.
The depot and contraband gates are now in front of us and all of the 600 civilian workforce and service personnel gaining access to the magazines, would pass through and be searched for any item that was not allowed in the storage areas such as matches and cigarettes.
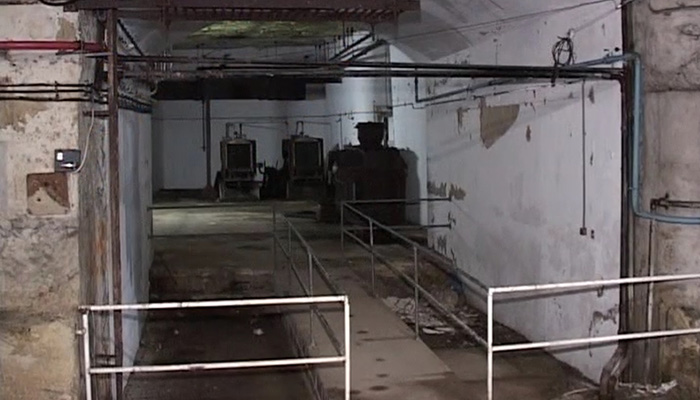
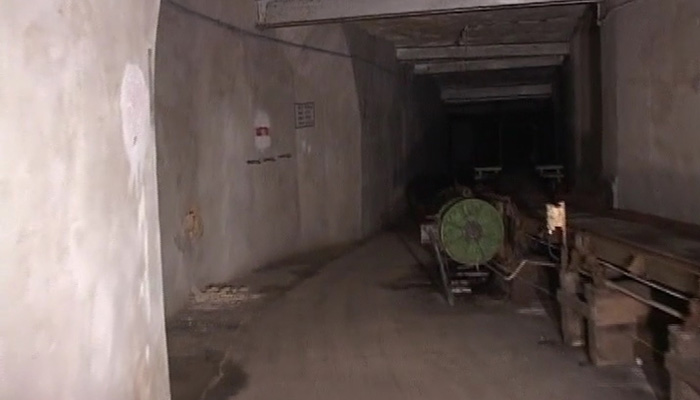
To our right is an area of old quarry, that was used by the Royal Engineers as a workshop and stores. Some old artefacts survive today within the store. A small collection of ammunition trucks that were so widely used in the depot, together with an old timber-built office. The concrete moulds used for the construction of many hundreds of columns throughout the depot also survive. Some of the original tipper trucks under-frames sill exist, although with modified tops, tipping mechanism having been removed, probably soon after the construction phase ended.
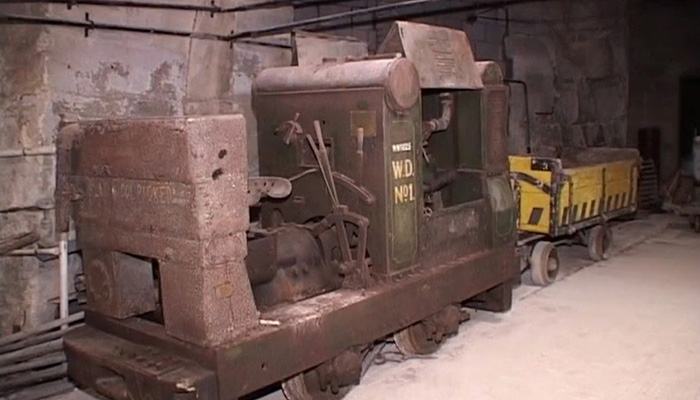
The most interesting item stored is this narrow-gauge Ruston diesel locomotive, No. WD1. Weighing three tons and having an output of 20 horsepower, a large fleet of these locomotives was used not only for the construction phase, but also during the depot's operational period by the Royal Engineers. Only two examples survive, No. 1 is seen here and No. 28, which is partially dismantled and was destine to go for restoration and display at the Royal Corps of Transport Museum.
Arriving back at the limit of the conveyor system, we turn north now into the ammunition districts towards the Hudswell Drift. Visually the districts are much alike, but there are a few interesting things to be seen, which we'll show you along the way.
The conveyor belt systems were supplied by Richard Sutcliffe & Co. with 57 26-inch-wide units installed, each varying in length from 18 feet to 2,400 feet. The districts all had substantial strengthening as can be seen here, with row-upon-row of rolled steel joists. The skilful use of concrete to corset the many tapering Bath stone pillars is also apparent.
The engineers also constructed many of these uniquely-shaped concrete reinforcing columns to give additional support to the Bath stone ceiling, which if left over a period of time, dries out, laminates and collapses. We pass through a small interconnecting tunnel, that was driven through a large Bath stone pillar within the district.
Note here the quarrymen's cuts in the walls, where the blocks of stone were removed and then in contrast the Royal Engineers' block work with the smooth face work.
This passageway would not have been used for ammunition, but served as access to the emergency exit up these steps to the right.
Each district was bounded by a separated enclosed corridor for use as an airway for the depot's extensive air conditioning. These airways doubled as emergency escape routes in case of a mishap with munitions within the district.
Each district airway was equipped with a large fan, such as this 90-inch variant to enable the air to be circulated from either the CDI intake or other airshaft intakes within the complex. It was possible to bypass the fans on foot through connecting doorways.
All of the districts except No. 5 have two entrance and exit points, one to the south on to the Main East/West haulage ways we've seen, and the second one through these blast doors to the north on to Hudswell Drift.
The drift was originally served by an overhead wire rope haulage system and here at the head of the drift we see the pulley wheel housing, where the wire haulage rope ran round.

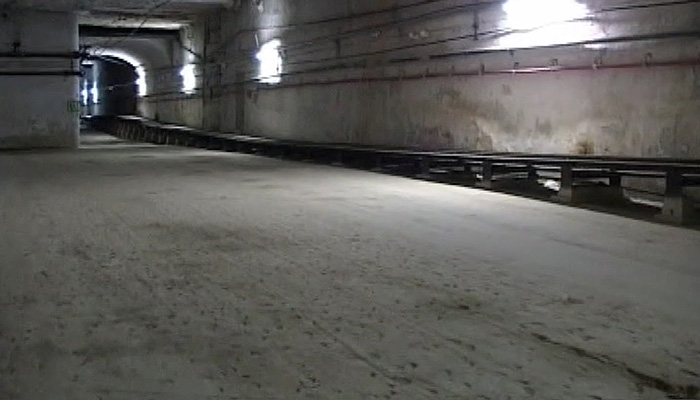
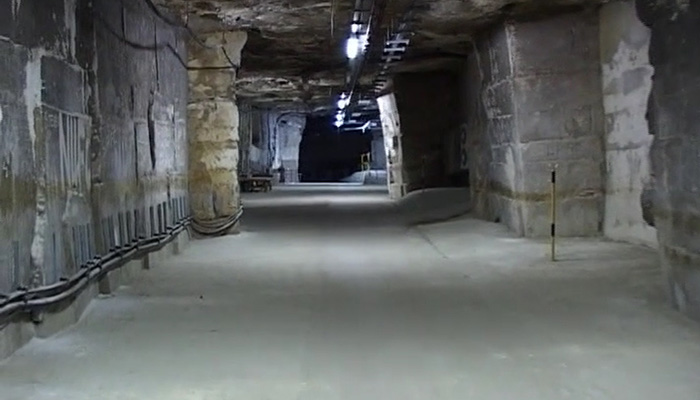
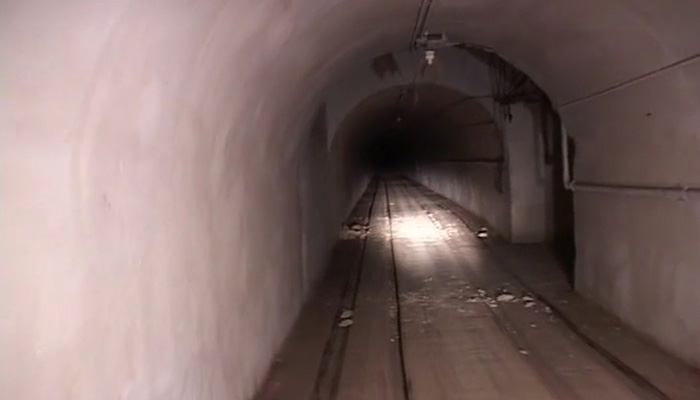
The wire rope system pulled ammunition trucks along the drift. This drift, which is 1,750 feet long, was constructed by the Royal Engineers as part of the depot's conversion. It was a totally new tunnelled haulage way, joining together all the storage districts along the northern perimeter of the depot. The engineering was completed to exceptional standards.
The two-foot-gauge railway lines clearly show the grooves in the concrete floor in which the rubber tyre of the dual-rimmed ammunition trucks ran. Later in the depot's life, the overhead rope haulage system was removed and electric truck haulage was favoured.
Approaching on the right is the entrance to the No. 3 district.
In this view the Hudswell Drift entrance is in the distance and the downwards slope of the floor is evident. This is because the quarrymen's workings followed the stone strata and the geology slopes towards Box railway tunnel. The original quarry floor was some eight to ten feet lower than that of the new one, as the engineers used some of the waste stone as a base beneath the new floor.
There was considerable straightening and shaping carried out by the engineers here, but the old quarry passageways are still evident today. This junction is such an example, the conveyor following an old haulage way to the north and a parallel haulage way, which we're travelling, serving another heading into the quarry workings.

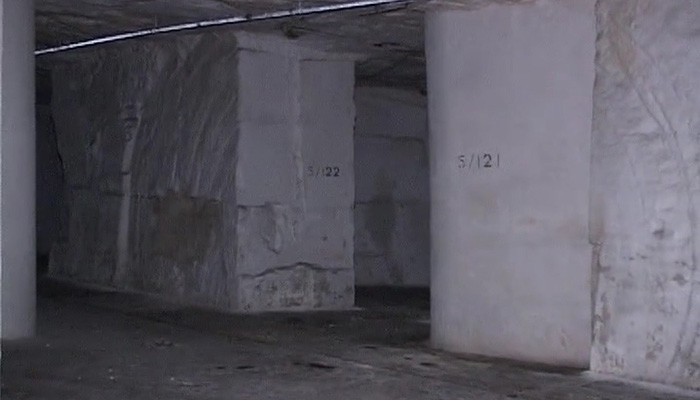
Some of the pillars did not require additional strengthening and those remaining still show the picking and saw marks of the quarrymen from the then Corsham Down Quarry.
All these areas in the districts were used for ammunition storage, wooden dunnage was used to help stack the ammunitions and the bombs and shells would have been stacked high, near enough to ceiling level.
All the district areas were numbered, initially the areas were number one, two, three, four and so on, but later a district prefix was included as we see today. In this example 3/268 means district three, area 268. The entire site was painted regulation white, it must have been a permanent ongoing maintenance task for the pioneer corp.
Back in the Hudswell Drift, approximately 600 feet of the new drift was completed with an arched ceiling. Soon after the entrance to four district, the ceiling height increases and the many strengthening beams inserted can be seen.
No. 4 districts conveyor system differs from the rest of the depot, in that the conveyor supports are all built of wood instead of the regulation concrete. This was a temporary installation to get the district working for the large influx of ammunition during the war, but the plan to alter them to concrete was never realised.
Seen here are the electric motors for the conveyers, which are a different type, mounted on the side of the conveyor instead of underneath on the floor as elsewhere. At the Main West end of the conveyor behind the walls on either side is the office complex.
Just over halfway along the Hudswell Drift then alignment changes and we pass a controllers office. Then the entrance on the right to ten district's storage areas.

The next doorway on the right is an exit from an airway located between districts ten and six. And now we reach the entrance to No. 6 district. A 60 foot long tunnel is traversed before the district doors are reached, this is due to the alignment to the new Hudswell Drift, which offered the straightest route towards the surface lifts. This left a large section of virgin Bath stone to be tunnelled through to allow connection into the previously quarried chambers, which became the storage areas.
The longest district conveyor is found here, measuring 845 feet in length, because of this more archways through Bath stone pillars were engineered in this district than any other.
At the south end of the district a large NAAFI canteen was located. Accessed from the Main East haulage way, it provided the civilian workforce and other ranks with canteen and recreational facilities. Officers and equivalent grade civilian workers used an officers' mess, which was located in the barrack block area adjacent to No. 6 slope shaft.
Unusually, still in place on the wall is a conveyor belt loading chart, having survived years since the depot's closure in the now very damp conditions.
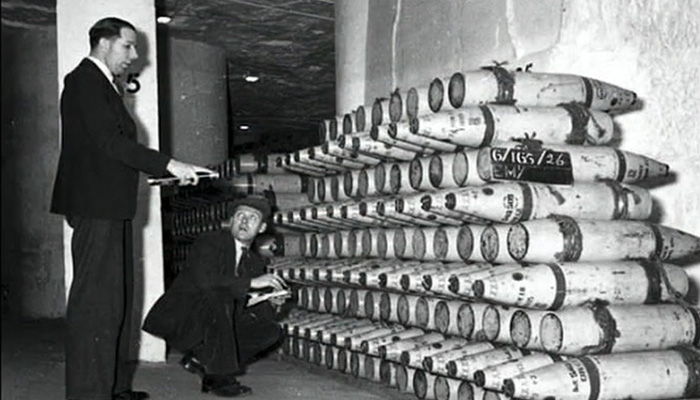
The following photographs illustrate the typical activity within six district. The checking of stacked shells by the depot's administrative staff, receipt of fuses into storage area 198 and issue of tin munitions on to the district's conveyor.
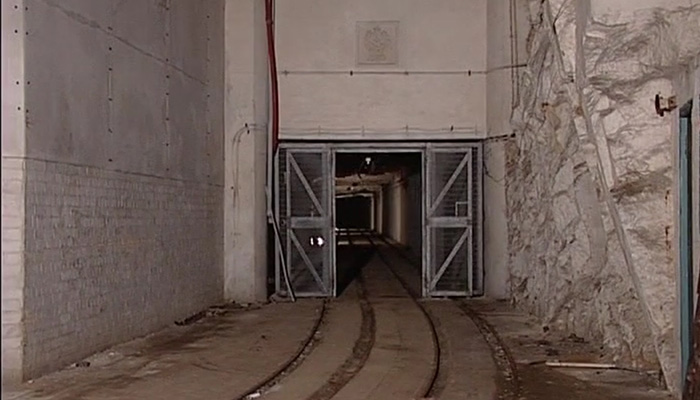
As we approach the end of the drift it can be seen that the ceiling is even lower. Passing through the security gates and looking back down the drift, we see above the drift entrance the proudly carved Royal Engineers' badge that commemorates the 1938 opening of the establishment.
This early picture taken at that same location shows the rope haulage equipment in situ, with a truck being hauled out of the drift towards the surface lifts. Trucks could also be pushed along the drift manually, as this wartime illustration shows.
The trucks were fitted with dual-purpose wheels, they had a flanged wheel for running on the metal rails laid in the depot floor and a rubber wheel for running over the tarmac flooring where the rails were not laid. Today the trucks are still here, although sadly rotting and decaying, having now sat out of use for over 40 years since the depot's closure.
A short distance away is the Hudswell lifts. In this 1938 view of the north lifts, the overhead wire rope winding motor can be seen with the ropes heading back towards the camera man and into the Hudswell Drift. In today's view they're still there, but longtime out of use, along with the abandoned trucks.
These vertical shafts were the original entrances to the Randell & Saunders 1874 Hudswell Quarry. They're capped and blocked now and emerged 110 feet above into a grassed recreational area alongside Park Lane.
This large parcel of land, stretching from the distant quarrymen's cottages down and beyond the tree line was the original stone yard, housing the steam winches for the shafts and the stonemason's workshops. Only airshafts from underground remain now.
With the military constructed concrete and tarmac roads still mapping its layout, this field played a major role in the depot's logistics with the ammunition.
Back underground theses are the south lifts and behind us is the entrance to No. 8 district. The other exit leads into a connecting passageway that takes you back towards the north lifts.
In an adjacent old store room, the remains of the overhead rope haulage devices lie, long forgotten about and now, without the use of lifts, too heavy to easily remove from the site.
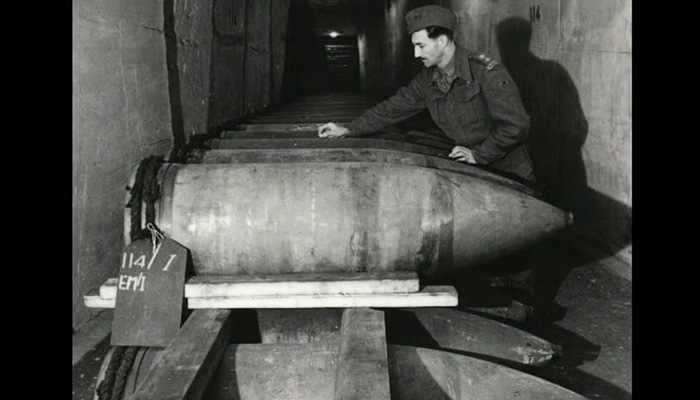
Some of the large shells that the depot handled, were these one ton monsters used on an 18 inch railway-mounted gun. To enable them to be moved around the depot special trucks were built, of which one still remains. Others ending up like this former truck body, totally consumed by dry rot.
In No. 8 district, one of the Hudswell Quarry's main haulage ways is still apparent, even with the added Royal Engineers' regimented row of vertical support columns.

This wartime photograph taken in No. 7 district shows just how the ammunition was stored. Today scared and abandoned military packaging is taking its place.
The entrance to No. 5 district is directly off the Main East haulage way, the blast doors are now plated over and most of the conveyor belt connection to the high and low system has been removed.
In the background is No. 2 slope shaft that leads up to the main surface loading platform. This wartime image show contact mine fuses being dispatched from No. 5 district towards the railway platform and six inch shells arriving on the No. 2 slope shaft conveyor.
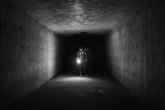
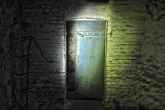
The No. 2 shaft is still completely original with conveyor belting, stairs and trolley rails still in place. On a hot day a fog or mist forms in the slope shafts where the warm air from above meets the constant 51 degree cold air from below. It adds even more mystique to this already fascinating secret place.
Here in No. 5 district, not the ark-shaped saw marks on the walls. These were made by the Samson stone cutting machines, brought in for the conversion work and that subsequently brought about the total mechanisation of the Bath stone industry after the war.
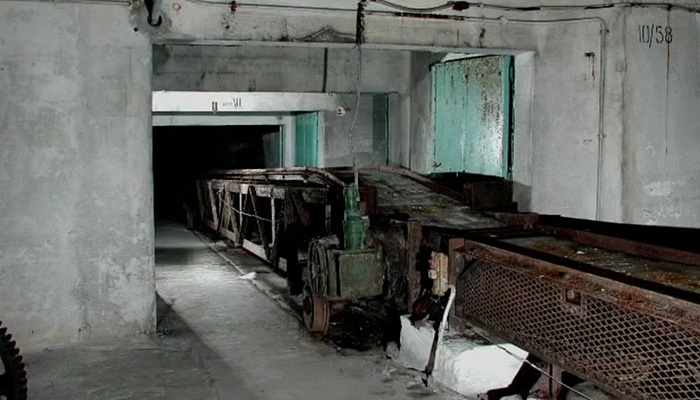
The district, along with numbers ten and 11, which are adjacent, was also fitted originally with an overhead rope haulage system of the type we've seen in the Hudswell Drift. The railway lines are still here, as are the t-shaped girders that supported the wire rope mechanisms, the latter-day introduced conveyor belting system being built on top of one of the tracks. At the end of the railway lines, the horizontal girders and still in place, that housed the wire rope return wheel.
These wooden are unusual as most reinforcing and support work was carried out using concrete.
This was the order of the day during World War II, 15 hour shifts, manhandling shells on to a sack barrow and then heading off to the storage areas to stack them in piles. What dangerous times they were.

Moving next door in to 11 district, these blast doors gave access directly on to railways platform area next to the power station. The old wire rope lying on the floor was part of a bomb winch that hauled the one ton 18 inch shells on their special wagons from the platform up and into the district.
Just a short distance further on, slope shaft No. 4 enters the district. This and the neighbouring No. 10 district are the only two districts with direct access into them by a slope shaft. To enable the ammunition to be transferred to central conveyor, this special bridging conveyor was used.
As ten and 11 districts bounded each other and shared the same central conveyor, a special arrangement was called for where the airway corridor crossed the conveyor. Between the two green blast doors is an airway corridor, under normal circumstances the doors would be shut allowing the circulating air passage to the other parts of the depot. When ammunition needed to be moved, this special travelator conveyor would be winched into place to connect the two belts and two districts together.
No. 10 district has one of the lowest ceilings in the depot, the highest being in nine district at an average of 25 feet. As ten and 11 districts were used for the storage of pyrotechnics, cordite, smoke and breech loading cartridges, the two districts were the first in the depot to be air conditioned. However, to be able to deal with the very large pressure wave caused by if an accident was to occur with the cordite, two additional vertical shafts were made to act as pressure release vents to the open air.
We return back to the main railway platform where we started our tour. We must extended our most grateful thanks to the Ministry of Defence for allowing us to record the fascinating historic features of this establishment.
The complex, having been started by Isambard Kingdom Brunel's Box Tunnel construction work in 1836 and rejuvenated 100 years later by the Royal Engineers, continues today to serve the British military.
As to future plans for the site, the Ministry of Defence have made no comment, but it's clear to see that Corsham's military history will continue on here for a long time to come.
Credits
Camera: James Menday
Lighting: Brian Williams
Sound editor: Tom Scotford
Narrated by: Jeremy English
Archive photographs: Imperial War Museum, Nick McCamley, Colin Maggs MBE
Technical advisors: Derek Hawkins, David Pollard, Andy Quinn MBE
With thanks to: Ministry of Defence Joint Services Corsham, Kieth Palmer, Chris Batstone
Script supervisor: Eileen Franklyn
Edited and produced by: MVP Video Guildford
Want More Underground Secrets?
-
 January 05, 2019
Explore the history of Bath stone and see rare sights hidden underground in Wiltshire that have seldom been seen and some that may never be seen again.
Related Content


Daily Horoscopes
Leo

You have sudden flashes of intuition and insight right now that can serve you well if you pay attention to them. You may have strange dreams or visions that come suddenly and leave just as quickly, so carry a notepad.... Read More


You May Also Like


